Menu
Microbots
0
  • Make
    • Getting Started
    • Maker Builds
    • Education
  • Shop
    • Maker-Modules
    • Maker-Packs
    • Tools & Gears
    • Robots & Displays
  • About
    • Our Story
    • Reach Out
    • FAQs
  • English
  • Your Cart is Empty
Microbots
  • Make
    • Getting Started
    • Maker Builds
    • Education
  • Shop
    • Maker-Modules
    • Maker-Packs
    • Tools & Gears
    • Robots & Displays
  • About
    • Our Story
    • Reach Out
    • FAQs
  • Language

  • 0 0

CodeCell: Getting Started with Wi-Fi

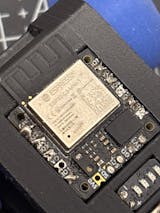
The CodeCell module, powered by the ESP32-C3, has built-in Wi-Fi capabilities that allow it to connect to the internet, communicate with other devices, and even host a small web server. Whether you're a beginner or an experienced maker, this guide will help you get started with Wi-Fi on CodeCell.

What is Wi-Fi, and Why Use It?

Wi-Fi allows your CodeCell to wirelessly connect to the internet or a local network. This means you can:

  • Control your CodeCell remotely from a smartphone or computer
  • Send and receive data over the internet
  • Host a small web page that other devices can access

Now, let's go step by step to connect CodeCell to Wi-Fi.

Connecting CodeCell to a Wi-Fi Network

To connect your CodeCell to a Wi-Fi network, you need to provide the network name (SSID) and password. Let's use the Arduino IDE to write a simple program that connects CodeCell to Wi-Fi.

#include <WiFi.h>
#include <CodeCell.h>

CodeCell myCodeCell;
const char* ssid = "your_SSID"; // Replace with your Wi-Fi name
const char* password = "your_PASSWORD"; // Replace with your Wi-Fi password

void setup() {
    Serial.begin(115200); // Start the Serial Monitor
    myCodeCell.Init(LIGHT); // Set up CodeCell's light sensor
    WiFi.begin(ssid, password); // Connect to Wi-Fi

    Serial.print("Connecting to Wi-Fi");
    while (WiFi.status() != WL_CONNECTED) {
        delay(500);
        Serial.print("."); // Print dots while connecting
    }
    
    Serial.println("\nConnected!");
    Serial.print("IP Address: ");
    Serial.println(WiFi.localIP()); // Print the assigned IP address
}

void loop() {
    // Run every 10Hz
    if (myCodeCell.Run(10)) {
        // Your main loop code here
    }
}

How It Works:

  • This code starts the Serial Monitor to track the Wi-Fi connection progress.
  • It connects to Wi-Fi using WiFi.begin(ssid, password);.
  • Once connected, it prints the assigned IP address.

Troubleshooting:

  • If it doesn’t connect, double-check your SSID and password.
  • Make sure your router is on and not blocking unknown devices.

Hosting a Simple Web Page on CodeCell

Once CodeCell is connected to Wi-Fi, we can make it act like a tiny web server! This means we can control it or display information using a web page.

#include <WiFi.h>
#include <WebServer.h>
#include <CodeCell.h>

CodeCell myCodeCell;
const char* ssid = "your_SSID";
const char* password = "your_PASSWORD";

WebServer server(80);

void handleRoot() {
    int proximityValue = myCodeCell.Light_ProximityRead(); // Read proximity sensor
    String response = "

Welcome to CodeCell Wi-Fi Server!

"; response += "

Proximity Value: " + String(proximityValue) + "

"; server.send(200, "text/html", response); } void setup() { Serial.begin(115200); myCodeCell.Init(LIGHT); // Set up CodeCell's light sensor WiFi.begin(ssid, password); while (WiFi.status() != WL_CONNECTED) { delay(500); Serial.print("."); } Serial.println("\nConnected to Wi-Fi"); Serial.print("IP Address: "); Serial.println(WiFi.localIP()); server.on("/", handleRoot); server.begin(); Serial.println("HTTP server started"); } void loop() { if(myCodeCell.Run(10)){ server.handleClient(); } }

How It Works:

  • This code sets up a simple web server that displays a message.
  • When you type the IP address (printed in Serial Monitor) into a browser, it will show a webpage saying "Welcome to CodeCell Wi-Fi Server!" and shows the current proximity value read by the CodeCell.

Try It Out!

  1. Upload the code to CodeCell.
  2. Open the Serial Monitor to find the IP Address.
  3. Type the IP address into a browser – you should see the message!
  4. Refresh the page to see the proximity value update

Sending Data to a Server (Basic IoT Example)

CodeCell can also send data to a web server, such as a cloud service that collects sensor readings.

#include <WiFi.h>
#include <HTTPClient.h>
#include <CodeCell.h>

CodeCell myCodeCell;
const char* ssid = "your_SSID";
const char* password = "your_PASSWORD";
const char* serverName = "http://example.com/data"; // Replace with your server URL

void setup() {
    Serial.begin(115200);
    myCodeCell.Init(LIGHT); // Set up CodeCell's light sensor
    WiFi.begin(ssid, password);
    while (WiFi.status() != WL_CONNECTED) {
        delay(500);
        Serial.print(".");
    }
    Serial.println("Connected to Wi-Fi");
}

void loop() {
    if (myCodeCell.Run(10)) { // Run every 10hz
        HTTPClient http;
        http.begin(serverName);
        int httpResponseCode = http.GET();
        Serial.print("HTTP Response code: ");
        Serial.println(httpResponseCode);
        http.end();
    }
}

How It Works:

  • The CodeCell connects to Wi-Fi and sends a request to http://example.com/data.
  • The response is printed in the Serial Monitor.
  • You can use this method to send sensor data to a web service!


Conclusion

Wi-Fi makes CodeCell powerful for IoT projects! Start experimenting, and soon you’ll be building amazing projects!

  • Share:

Follow

Github

  • About
  • Software
  • Education
  • Contact
  • FAQs
  • Terms
  • Refund Policy
  • Privacy Policy

Join our Community ~ Be the first to know about new products and get exciting deals!

© 2025 Microbots.